Wednesday, December 15, 2010

My Current Obsession: Cleaning My Makeup Brushes (MAC Brush Cleanser vs. Estee Lauder Brush Cleanser)

Hello lovelies!

Haven't blogged for over a week, but finally I have some chance to sit down and talk about one of my current obsessions at the moment.... cleaning my makeup brushes! XD


Yes! It sounds kind of silly, but I find that there's nothing wrong with being obsessive about cleaning brushes! It's good for our brushes and for our skin as well! I have to be honest though that I'm talking about spot cleaning rather than deep cleaning brushes. I deep clean my brushes maybe once a week or once every two weeks. I find it isn't that necessary to deep clean them often since I spot clean my brushes all the time.

When I first was looking for cheaper alternatives for brush cleansers, I decided to try out the Essence of Beauty Brush cleaners from CVS.  I'm a fan of their brushes so I had high expectations for the two cleansers I got.

One of the cleansers was meant for spot cleaning and looked like:

Image from: kizzy-online.com

I was very disappointed with this brush cleanser because it did absolutely nothing for my brushes.  None of the colors came out of the brushes and literally I felt like I was spraying water on my brushes.  I ended up throwing it out so I'm not 100% sure what are the ingredients.  I do recall it had a small scent of alcohol, but let me repeat that it did nothing for my brushes.  To add to that, it took so long for my brushes to dry! The price was nice though at under $5.

I also purchased the Essence of Beauty Extra Gentle Brush Cleaner (4.2 FL. OZ)


I ended up keeping this brush cleanser since it's meant for more deep cleaning uses.  I found that it did deep clean my brushes, but I would have to say that it didn't do much for removing colors from brushes, especially from my foundation brushes and my natural hair brushes.  There's an interesting smell to it, but overall, it's "okay" for the cost of $5.

I got tired of not getting the results I wanted when I spot cleaned my brushes so I opted for a more pricier brush cleanser from Estee Lauder.  The exact name is the Estee Lauder Hygienic Spray.  I have an older version of this spray brush cleanser... or I think I do? I can't seem to find it elsewhere online, but the current brush cleansers from Estee Lauder look awfully similar to the MAC brush cleanser.

Here's mine!

Here's the current brush cleanser from Estee Lauder.

This brush cleanser definitely did more for my brushes than the Essence of Beauty cleanser, but it still was hard to take off colors when spot cleaning. The price is $15 for this cleanser.  It did seem to spot clean my brushes but after a few sprays, the result wasn't what I was highly anticipated.  The cleanser is high in alcohol scent and brushes dry fairly quickly after each use.  What I do like about this spray is that it contains witch hazel and could also be used to sanitize hands, cosmetic pencils, and brushes.  I never attempted to deep clean my brushes with this brush cleanser.

I decided to give the MAC brush cleanser a try since it was cheaper than the Estee Lauder one at $12.  The MAC one is very popular and highly recommended for those who want good spot cleaning for their brushes.


I found the color of this brush cleanser to be a very pretty light pink! :)

I was so eager to test it out once I purchased it and the results were amazing! I remember that I tweeted about how much I loved this brush cleanser after my first use of it! I think I tweeted that I never felt so happy spot cleaning my brushes! xD The amazing factor was that the colors really disappeared from my brushes and my brushes looked good as new! Even the toughest colors somehow seemed to come off!

One thing I didn't like was the packaging since it didn't have a spray. In order to avoid losing product, I put some of the cleanser in a spray bottle.


If you don't believe me... haha... I gave it a test for you to see!!

Here's a showdown of the Estee Lauder Hygienic Spray Brush Cleanser and the MAC Brush Cleanser!
You guys can be the judge!


DUN DUN DUN!!! ^o^

For this experiment/battle, I chose to use a really highly pigmented eyeshadow to use with my MAC 217 brush.  The lucky eyeshadow was chosen from my Urban Decay Naked Palette.


The shade I used was Creep, which is a dark blue shadow with silver flex.


Here's the clean MAC 217 brush:

Okay.. now let's put some of the dark shadow on it!


First up is going to be the MAC cleanser.  I like to clean my brushes on a clean paper towel, but lots of people like to use facial tissue or towels.  Just make sure it's clean! :)

Here's the first tinkle... I mean spray! haha.

Okay, now let's get cleaning!
Spray 1:

ehh... not bad but didn't clean everything. As you can see on the towel, a lot of the pigment from the shadow came off. Let's give it another try!

Spray 2:
oooh! Getting there! Most of the pigment is off the brush! 
How about we give it one more little spray and I think it will do the trick!

Spray 3:

Ah yes! The result is lovely! It looks pretty clean now! :)

Okay! Shall we move onto the opponent... the Estee Lauder Hygienic Spray Brush Cleanser?

We have the brush with more eyeshadow again:

Let's get cleaning again! Woohoo!

Spray 1:
The first spot cleaning looks actually pretty good! I would have to say it looks cleaner than how it looked with the first spray of the MAC Brush Cleanser.

Spray 2:
The second spray hardly did anything! As you can see on the towel, hardly any pigments came off the brush.
I think this is the problem with this brush cleanser.  It doesn't thoroughly remove the pigments from the brush. If I only had the Estee Lauder brush cleanser, I would have to stop on the second spray because there's no point in trying to clean it any further.

I still wanted to clean my brush so I ended up using one more spray of the MAC Brush Cleanser and it did the trick!! :)

Good as new!

So what do you guys think?

I would have to say the MAC Brush Cleanser is the winner!

For deep cleaning my brushes, I like to use the technique with using Extra Virgin Olive Oil and Dawn Dishwashing Soap.  I feel that this method really takes off the pigments and kills all the germs and bacteria on my brushes!

Make sure to give those brushes a good cleaning!

Love,
Mindy

Sunday, December 5, 2010

FOTD: Out and About on a Sunday Morning

Hello loves!

I just wanted to make a quick FOTD (Face of the Day) blog post before I head on out.
I think I've gotten addicted to blogging again... or at least reading blogs and stuff. :)

Anyways, here are some pics of my face today. That sounds kind of funny for some reason!
It makes me happy that most of my acne has cleared, but my skin looks really clean thanks to my camera's beauty mode function.  I still have a few blemishes here and there.


Makeup on my face:

Foundation: Revlon Photoready Makeup in 003 Shell
Clinique Acne Solutions Clearing Concealer
MAC Studio Finish Concealer in NW20
MAC Pressed Blot Powder in Medium
E.L.F. Contouring Blush and Bronzing Powder


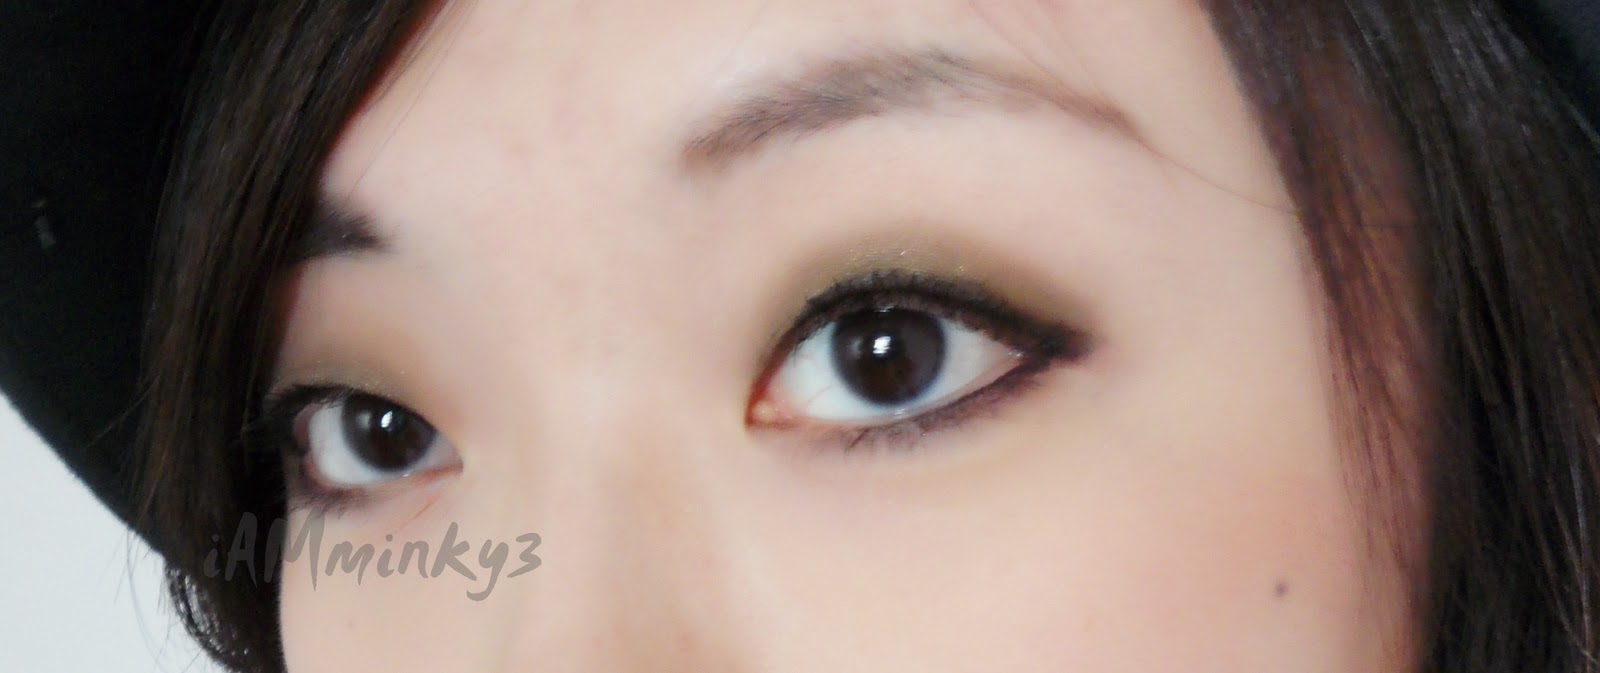
Having monolid (single eyelid) eyes, I feel like I have a lot lid space (which I am actually happy about).  As you can see from my pictures, I have so much room from my eyes to my eyebrows.  I find this feature about myself actually fun because I have lots of space to play around with eyeshadow and different looks.  When I want to be dramatic, I can put a dark eyeshadow a little higher than usual and blend it out.  For a more natural look, I try not to pull the color too high, but high enough so that it can make my eyes appear larger.
If you have monolid eyes, be proud of them! LOL.  For a long time, I didn't know how to work with monolid eyes and I struggled with figuring out the best looks.  For a monolid girl, I have fairly large eyes, but I still struggle with the "small eyes" feature and sometimes it's hard for me to replicate a certain look.  Just remember that practice makes perfect and it's all about trial and error.

Eye makeup today:

Urban Decay Primer Potion
Urban Decay Naked Palette - Darkhorse, Half Baked, Smog, and Creep
Urban Decay 24/7 Liner in Whiskey
MAC Eyeshadow in Blanc Type (for highlight)
Stila Smudge Pot in Black to line my eyes
Makeup Forever Aqua Eyes in 0L to line my bottom lashline
Maybelline Lash Stiletto Voluptuous Mascara in Very Black

I think I'm going through an Urban Decay obsession at the moment!!!

I'm hoping to make more tutorials (video and pic-tuts) in a couple weeks after finals and stuff. I can't wait to go on break and visit my family and see some snow!  My younger sister texted me a picture of the first snow they had a few days ago.  She knows how much I love snow... 

I may or may not blog later today! We'll see what happens. ♥

Love,
Mindy

Saturday, December 4, 2010

New HG Face Powder: MAC Blot Powder vs. MAC Mineralized Skinfinish Natural

I've been meaning to post this a while ago, but I finally have a chance to share with you guys my new HG face powder from MAC. After reading and hearing so many good things about the MAC Mineralized Skinfinish Natural, I had to give it a try and see if it lived up to its hype.

Here's a brief intro about my skin:
I would consider myself very fair skinned for being Asian.  Lots of my friends say that I'm paler than a lot of their white friends. LOL. I am about shade NC 15-20 for foundations from MAC.  Let's just say, I lean more towards NC 15.  I hardly get tan, even in the summer because I try not to go outside much because I have sensitive skin that burns really easily (even with using high SPF products).  Also, I have sensitive, mainly combination (occasionally dry), acne-prone skin, and I tend to get somewhat oily on my t-zone (forehead and nose).

Anyways, my goal when looking for a powder is something that will set my foundation and concealer well, not oxidize too much into a dark color, not too cakey, and has long-lasting power.  To add to that, I also look for something that will control oil and not break me out.  In other words, I've been on the search for that "perfect" powder that would do everything that I mentioned before.

I've tried several powders before, but the powder that I've been loyal to has been my Maybelline Dream Matte Powder - Cream, which is the lightest shade that they have.


As you can see, I've hit pan!

The reason why I liked the Maybelline Dream Matte Powder - Cream was because it had nice coverage and felt great on the skin.  Also, it helped set my foundation and gave a nice matte finish.  It seemed to control oil on my face and the price was my favorite part about it! Under $10 it was a great buy!  The only problem I had with this powder was that it wasn't long lasting/wearing.  After going out for a little bit, I noticed that the powder seemed to be doing nothing for my skin.  

I decided to be a little adventurous and try out some MAC powders.  At first, I was slightly hesitant because MAC face products such as their primers and foundations tend to break me out. :(  The only thing that really works for me are their concealers (which I really love).  Anyways, I decided to go with the MAC Mineralized Skinfinish (MSF) Natural because so many people love it and people have been saying that the Maybelline Dream Matte Powder is a great alternative to the MSF Natural.
I went to the MAC store and looked at their MSF Natural shades and the makeup artist there told me that I would be better off with Light Medium.  I thought I may need to go with Light, but she said that it would be too light for me.  Being slightly weary, I tried it in the store, but just decided to try it and test it out when I got home.


At first glance, I noticed that the powder looked very similar to the Maybelline Dream Matte Powder and it had the same consistency.  The product itself is very powdery so I took note that I will not be needing much on a powder brush when I apply it.  However, when I looked at the powder, the powder appeared slightly darker than the Dream Matte Powder in Light.  When you apply this powder, remember to not use too much because it will appear cakey.  
Lot of people have claimed that this powder gives a almost flawless and natural finish and some people use this as a foundation itself.  For me, since I was looking for a setting powder, I applied this after my foundation.  

Here is what I experienced with this powder after using this for about 2 weeks:
The powder was slightly too yellow/dark for my skin when it oxidized after a few hours.  When I first applied it after foundation, it was a decent color match, but the powder kept getting darker and darker.  The MAC makeup artist explained that this is because when the powder mixes with oils, it will oxidize into a darker color.  My face ended up looking a lot more yellow throughout the day.  Another thing I noticed with this was that it did absolutely nothing for oil control on my face.  If I may say it, I actually thought that this powder may have contributed more oil to my face.  Because of all the oil, the powder also didn't seem very long lasting and at the end of the day, my skin didn't look good at all!  To add to that, I was beginning to see little bumps on my forehead and this is a big "no no" for me.  I don't think the MSF Natural was the main reason for these little bumps, but I got scared and stopped using this powder.

I'm not exactly sure why this product didn't work for me because I had high expectations and hopes because of all the good reviews that it was getting from other people.  However, this being $26 (which isn't exactly cheap) I decided to return this, thanks to MAC's 30 day refund/exchange rule.

Feeling slightly disappointed with the MSF Natural, I decided to give MAC another try and bought the pressed MAC Blot Powder.  Several people have expressed their love for this powder and said that they used this to control the oil on their face and to set their foundation, hence the name: Blot Powder. 


What's nice is that it comes with a sponge applicator, but I don't use the sponge applicator for hygienic reasons. I don't like the idea of putting the oil on my face back into a product. >.<

As you may see, I purchased this product in the color "Medium" and I have to say it's still very light and is close in color to my Dream Matte powder.  The MAC makeup artist told me that the Blot Powder in "Light" would be too light.  I actually agreed with her.


Here's a side by side comparison of the three colors:


The blot powder looks like the lightest, but it's very similar to the Dream Matte powder in real life.

Reading and watching some reviews, several people say that the MAC Blot Powder gives no coverage or very minimum coverage.  To be honest, I think that this gives a great natural coverage.  I make sure to press my powder brush into the product and instead of swirling it around my face, I press the product onto my face.  This way, it gives a smooth coverage.  I definitely prefer this coverage over the MSF Natural.  Also, because it is very light, you have to make sure to not over-apply this powder because then it could look cakey.  Just remember that less is more with this product! :)

My favorite part about this powder is that it is long-lasting and also it controls the oil on my face well.  I'm writing this blog post at around 7:30 pm and I applied this powder at around 8:00 am.  To be honest, I didn't have to blot the oil on my face at all, which is very surprising for me because with other products, I would have to use my oil blotting sheets to remove excess oil.  I wouldn't say that my face is completely matte right now, but it is not so oily that I can get away with not blotting.  Also, my skin still looks smooth and decent.  I would take a picture right now, but I kind of look like a mess so I'll make sure to post pics next time.

This powder doesn't seem to oxidize into a darker color and I have to say that I don't have any weird bumps or break outs from it.  Could this be my new HG powder? During my last couple weeks I've been using this powder, I must say that I am very satisfied and happy with every use of it.  I would say that this is a very good $22 purchase and I will definitely be re-purchasing it.  If I change my mind, I will let you know, but this has taken my place for being my new HG powder!!! :)

If you guys want to purchase this, check out your local MAC store or check online at www.maccosmetics.com.

I am planning on making a video about this in detail and how I apply it, but for now, I think I am done with this post! :)
I know this was super long, but I wanted to share this with you guys so that you can check it out and share your experiences with these products! Let me know if you would like to share anything! I would love to hear.

Love,
Mindy

Friday, November 26, 2010

Black Friday Feature: Sigma Makeup

Hello loves!

For those of you who celebrated Thanksgiving yesterday, I hope you had a great one!
I literally had too much fun yesterday and it's all thanks to my friends! As I had blogged before, I was a little worried about having to spend Thanksgiving alone since it was my first away from the family, but my friends really did make up for it! I would post pics, but I totally forgot to take them! >.< I always find myself doing that whenever I bring my camera around. Anyways, I think a friend of mine took some pics that maybe I'll post later.
We actually did some house hopping last night going from her relative's house to her family friend's houses. Each house expected us all to eat their food so basically... (this might sound gross) I had to eat 2+ Thanksgiving dinners and to add to that, I had a Thanksgiving lunch as well.

Today will be my de-tox day! LOL. I couldn't manage to wake up to go Black Friday shopping, but no worries! There is always online shopping on Black Friday and also I like to take part on Cyber Monday! If you don't know what Cyber Monday is.... it's like Black Friday, but on Monday, most online stores will have massive sales and will have Free Shipping at the least! Yup! For those of your online shoppers out there, this is the perfect chance to save back on those shipping costs!

But today's feature is going to be one of my favorite brands of makeup brushes!
Sigma Makeup Brushes

I am an owner of the Sigma Complete Brush Kit without the Brush Roll and I've been using these brushes everyday for about half a year. Let me just say the quality of these brushes are fantastic!
The kit looks like this:
The kit consists of 5 face brushes and 7 eye brushes and I've been pretty set with all these brushes!
Brushes in this kit:
Small Angle - E65 - Essential for the application of gel or cream eyeliner on the upper and lower lash line. This brush is also excellent for filling out the eyebrows. Synthetic bristles.

Medium Angled Shading - E70 - Angled, tapered, flat top. Ideal to apply highlight shades underneath the eyebrow and on the inner corners. It can also be used for a precise application of darker shades on the crease area. Natural bristles.

Large Shader - E60 - Flat shape is ideal for application of cream formulas and eye shadow primers. It also works great with loose eye shadows or pigments. Can be used to apply color all over the lid or precisely on the lash line. Natural bristles.

Pencil - E30 - Precise application of color on the crease, outer corner, and upper and lower lash line. Also ideal to smudge out pencil liner. Natural bristles.

Large Angled Contour - F40 - The angled shape makes this brush ideal to apply blush or contour shades. Natural bristles.

Large Powder - F30 - Very dense with a rounded top. Ideal to apply powder products on face and body. Natural bristles.

Duo Fibre - F50 - Specially designed to generate an ‘airbrushed’ finish when used to apply liquid foundation. It can also be used to apply blush, highlight shades and loose pigments. Blend of synthetic and natural bristles.

Foundation - F60 - Can be used to apply liquid or cream foundation. It is also recommended to apply moisturizers and conceal large areas. Synthetic bristles.

Concealer - F70 - The rounded, tapered, flat shape makes this brush ideal to conceal the under eye area. It is also recommended for a precise application in small areas. Synthetic bristles.

Tapered Blending - E40 - Rounded and tapered top. Specially designed to apply and blend color on the crease. Natural bristles.

Eye Shading - E55 - Soft and dense with a rounded finish. Can be used to apply pressed or loose eye shadows and pigments. Ideal to build intense color on the eyelid. Natural bristles.

Eyeliner - E05 - An extra-fine tipped synthetic fiber brush that delivers a precise, firm, even stroke to line the eyes. 


What's also nice is that this brush kit comes with an extra free brush, which is very similar to the MAC 217 brush. Sigma calls this brush the E25.

I actually had purchased these brushes when they had their older names, but the newer ones are pretty self explanatory.
My favorite brush from this set would have the be the Duo Fibre F50 brush which is similar to the MAC 187 brush. I love stippling brushes as they give great airbrushed finishes for foundation application.

Make sure to check out Sigma for other products since they have a great collection of items! You can buy brushes individually or in sets to save more money.

If you are planning to purchase anything from Sigma, I have great Black Friday deals for you!

Use the checkout code: BF2010 for Free Shipping
Use the checkout code: ELLE for 10% off your entire order

Unfortunately, you won't be able to use both codes at the same time, but make sure to use one of them to SAVE!!! Have fun shopping!
Click the link under the picture below to go to the site and with at least $30 purchase, you will also get a free gift! I love how Sigma has great free gift offers. Who doesn't like free gifts? :)


Let me know if you would like more info or any pictures from my own Sigma Brushes collection since I've purchased a few individual brushes in addition to the Complete Brush Kit as well.

Have fun shopping!

Thursday, November 25, 2010

Happy Thanksgiving and MAC Pink Friday

Hello Loves!

I know I haven't blogged in the longest time, again... ughh
I just wanted to make sure to thank all of you for being a blog reader and supporting me nevertheless!
Thank you for being so kind and sweet and leaving comments and such.
If you are a youtube subscriber, I also want to thank you as well! ♥♥♥


Lately, I've been experiencing a lot of changes in my life.
Some of them good, some of them not so good.
But I've come to learn that you just gotta smile and get up stronger than before. Also, I've learned that there is so much love in this world and the little things make the biggest difference for many people.


This Thanksgiving Day, for the first time ever, I won't be celebrating it with my family.
Every year, I've always managed to share this day with the joy and warmth of family, but due to some circumstances, I won't be. At first, I was really sad and thought that I would be lonely this day. However, so many people have poured out their love and support and I definitely won't be hungry today! :) LOL.


I have so many things to be thankful for and to list them all would take me days, if not, years!
If you can write it, what are you most thankful for? ^o^


On another note, M.A.C. is having a special collaboration with Nicki Minaj and will be launching a new limited edition lipstick called Pink Friday!!


It will be exclusively available online at the MAC website for only 4 consecutive Fridays after November 26.
Here are the exact dates:

November 26
December 3
December 10
December 17

The color is described to be a bright creamy pink (satin finish). In my opinion, it looks very similar to the Lady Gaga Viva Glam lipstick from MAC, but I guess we just have to wait and see!
So, what do you all say? Do you think you'll be purchasing this lipstick?

Look at the ad! It's really flashy!


HAPPY THANKSGIVING, loves!!
Hope you have a wonderful day and eat lots and lots! xoxo

Love,
Mindy


Saturday, October 9, 2010

Where Have I Been? and Big Glasses Obsession

Hello Lovelies!
It's been a while since my last post... yet again.
Yes. I've been extremely busy and I think it's that time of the year when there is sooo much to do.
I'm currently getting ready for a big recording session for Wednesday (yes, I'm a musician). I'm a cellist and I have an important recording session coming up that requires lots and lots of preparation and time. Plus, with work, I've been getting no free time. T.T  But as I always say, "hard work pays off!" and I know that all the effort I'm putting into work and practicing will surely help me in the long run.

Also, the weather here has actually been acting completely bonkers. No joke! Just last week it reached 112 degrees (F) and then it was rainy and cold and went down to the 60s. Seriously, that's a little over 50 degrees difference right there. I literally went through a complete wardrobe change in a week from summer dresses to thick sweaters and boots. I love dressing for autumn and winter weather.  I'm a sucker for coats, scarves, hats, and boots.
Lately, I've been obsessing over big fashion glasses! These kinds of glasses are also know as "ulzzang" glasses or "nerdy" glasses.
Here are my glasses for the day:


At first, when I purchased these kinds of glasses, I was a little too scared to wear them out. I like to add a statement piece to my outfit, but these glasses just seemed a little too.... costume-like, at first! But one day, I was in one of those moods where I felt bored and wanted to try something new. I tied my hair back in a low ponytail, put on a sweater cardigan, and just popped on the glasses.


Surprisingly, I got a good response from other people. People actually complimented me saying that I looked "cute" with the glasses. Some people actually thought they were real glasses, regardless that the glasses were huge! From that day on, I gained the confidence that big "ulzzang" glasses can add a lot to a simple outfit or a day when you're feeling bored. Now, I'm on the urge to buy more.

I actually visited Little Tokyo and snatched a new pair of glasses that are even bigger than the ones I'm wearing in the pictures above. I'll be sure to take a picture of me wearing them next time. They're huge and make an even bigger statement! LOL. I think I need to gain another level of confidence to wear them out, but I think they will be fun to match with an outfit.

Where can you find them? You can find them at Pretty & Cute, the ulzzang headquarters! LOL. They have an amazing collection of ulzzang fashion glasses. Click here to see there awesome inventory of glasses!

How cute are they?? I want them all!!!
In the meantime, I'm tempted to head back to Little Tokyo to snatch a few more of these glasses. I'm regretting just getting only one new pair.

Btw... I'm dying my hair this week! Super excited since I used to love dying my hair. More updates coming soon!

♥,
Mindy